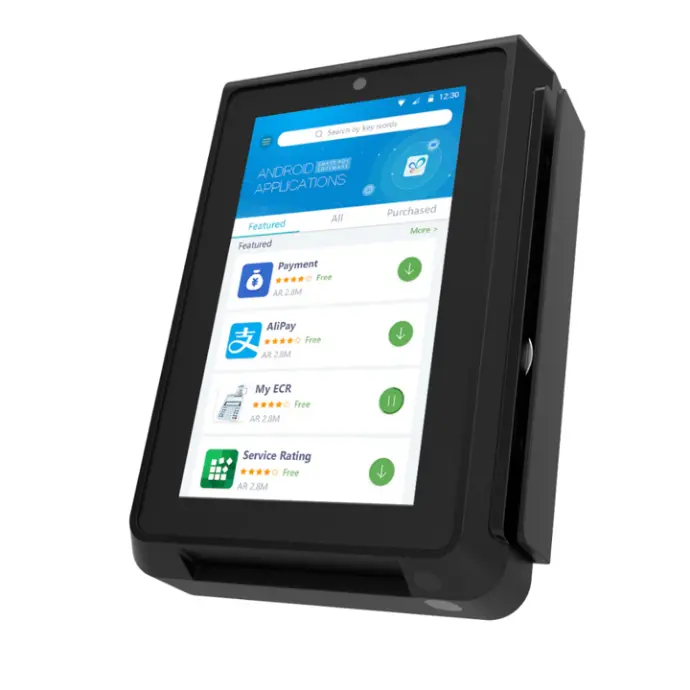
Virtual Pay Station
& activation relays
Parts List
1) Virtual Pay Station (VPS) - Pax IM30 Terminal
2) VPS power supply

3) PoE splitter

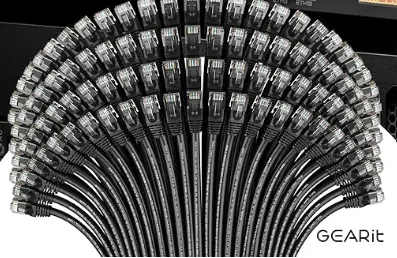
4) Pre-made network cable x2 (2ft)
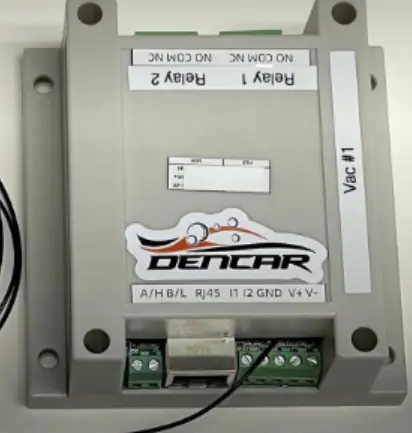
5) Activation relay
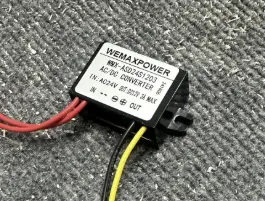
6) 24VAC to 12VDC Converter
7) Site Controller (with included HDMI dummy plug inserted in the HDMI interface)
Network connection
Determine if you will be installing the VPS module into a vacuum or into a self serve bay. Then, prepare the required network connection for your application.
If you are installing into a self serve bay, there must be a wired data connection from the Dencar network switch to each POE Splitter (or 1 wired connection for the VPS and 1 for the Relay if you are running cables).
If you are installing into a vacuum, we still recommend a wired data connection, but WIFI is optional for this set up. You will need a WIFI AP mounted on the outside of the building to provide the VPS with adequate signal strength. The antennas from the VPS and relay must have line of sight to the WIFI AP to ensure proper signal strength. You will need additional WIFI access points if you are connecting to devices on other sides of the building.
Site Controller Installation
The site controller will be placed on or in the network rack. We recommend on top so it is easter to get to if changes need to be made or for troubleshooting purposes. Connect power and internet. The network sheet will have what port the data cable needs to be plugged into. Next, place the HDMI dummy plug into the first HDMI port. Last, make sure the site controller is turned on.
Physical Installation
Determine where and how you will be mounting the VPS. If you are using Dencar’s external side mount box, there will be pre-cut holes for you.
If you are attaching the VPS to your existing self serve or vac box, then you will need to cut a hole to mount the VPS unit. The mounting hole will need to be 3 ¼ in wide by 4 ¾ in tall. Once the hole is cut, file and deburr the edges. Then confirm that the rubber gasket that is on the VPS, seals around the entirety of the hole.
Next, remove the rear housing of the VPS. Insert the VPS into the mounting hole. Then put the rear housing back on. Do not over tighten because the set bolts will strip. The set bolts only come one to one from the OEM.
Wiring Installation (Activation Relay)
The activation relay will use 24VAC or 24VDC for power. This can usually be found in most vac or self serve boxes already. The activation relay power terminals are labeled V+ and V-. These are found on the bottom of the activation relay next to the RJ45 jack.
You will be using relay 1 to signal to the timer (Com and NO). Most timers run off a positive pulse. But this will need to be verified before final terminations are made.
For example, with most Dixmor timers, you will put 24v positive to the Com terminal on the activation relay. Then you will run a wire from the NO terminal on the activation relay to the coin signal on Dixmor timer.
Wiring Installation (VPS)
The VPS units run off of 12VDC. There is a power supply that comes with the units that is a 120VAC input. Most self serve bays do not have that readily available, so we include a 24VAC to 12VDC converter.
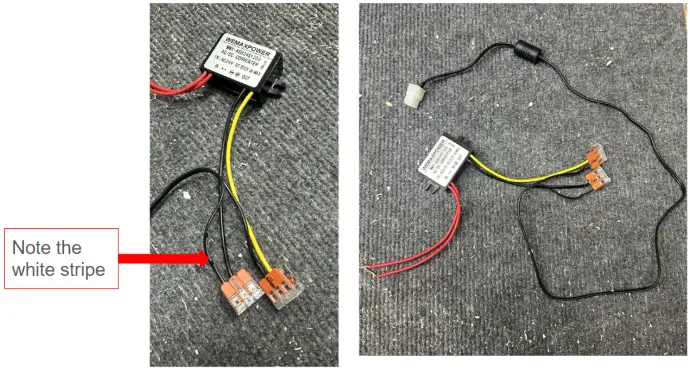
If you use the converter, you will need to cut the cable from the VPS power supply block. (Make sure you leave yourself enough slack to work with) Next, strip back the 2 wires and connect them to the output side of the 24VAC to 12VDC converter.
The yellow output wire will go to the solid black on the VPS input wire.
The black output wire will go to the black wire with a white stripe on it to the VPS input wire. See below for reference.
Do not plug power into the VPS yet!
Data / Internet Connection
For self serve you will need to locate the PoE splitter. Once you have it, the main line coming from the network to the self serve bay will get plugged into the “In” slot. You will need to let this be plugged in for about 15 seconds before you plug in anything else to it. Next, take the 2 pre-made cat6 cables and plug them into the 2 open slots. (out & camera). Then plug one of them into the activation relay and the other into the VPS.
For vacuums that are using WIFI, you will simply need to mount both WIFI antennes to the exterior of vacuum, or route them up under the dome cover if it is plastic. One for the activation relay, and one for the VPS. You will not be using the PoE splitter in this situation. If you are not 100% sure on your setup, or where to mount the antennas, please call in and ask for Sam.
330-595-2022 ext. 712
Final Assembly
Once the above steps are completed, we ask that you double check and test all the data lines for connectivity. After you are positive the wiring and data lines are all good to go, you can plug in the power to the VPS.
Once it turns on, you will see a white screen for a few seconds. This is expected. Please look for a grey box to pop up on the bottom half of the screen with the IP address of the device. It will only last for a couple seconds, then it will take you to the home screen. Give it 10-20 seconds and it should auto launch the Dencar app. If it does not auto launch after 10-20 seconds, that is okay. Just tap the Dencar app on the screen and it will launch. (It is the white square with the orange circle in it)